Getting Started
In this tutorial, you will use ZeroDev to send gasless transactions and bundle transactions.
Create a project
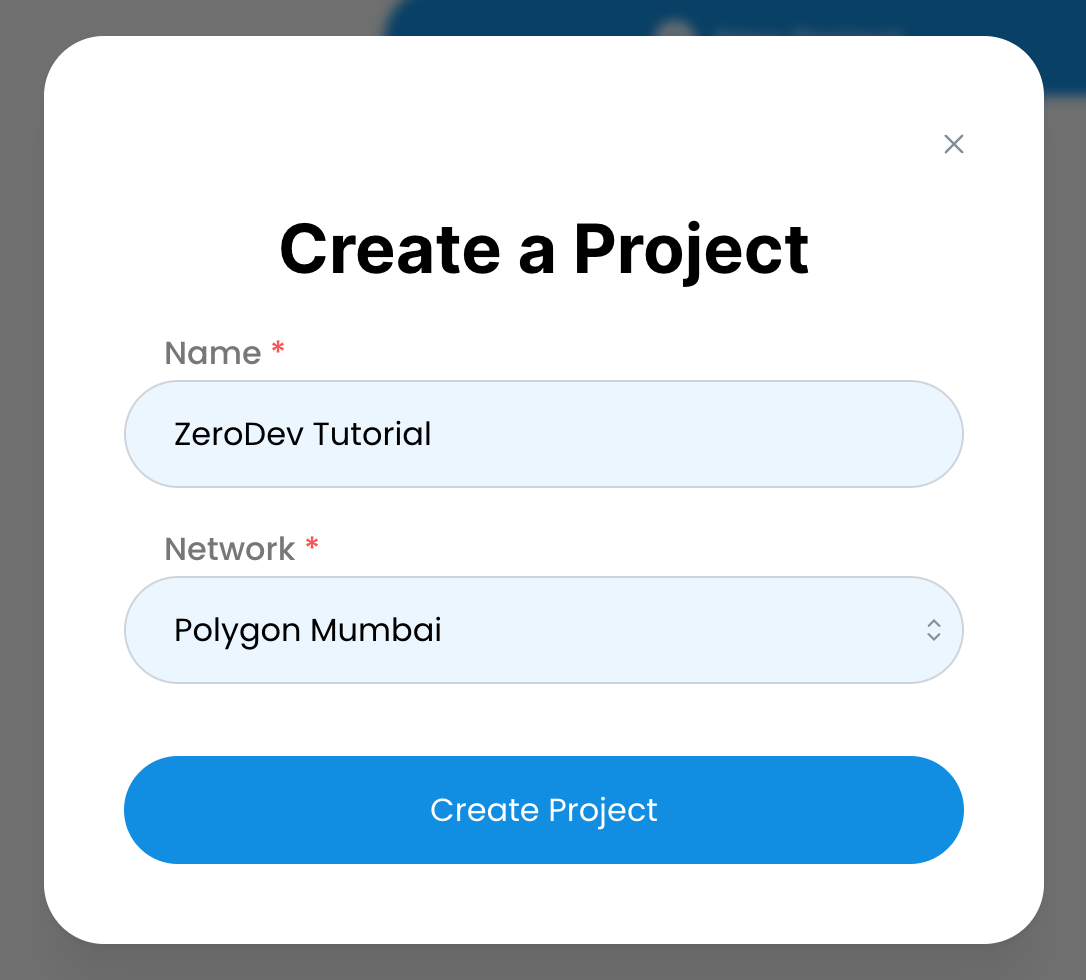
Go to the ZeroDev dashboard and create a project for Polygon Mumbai.


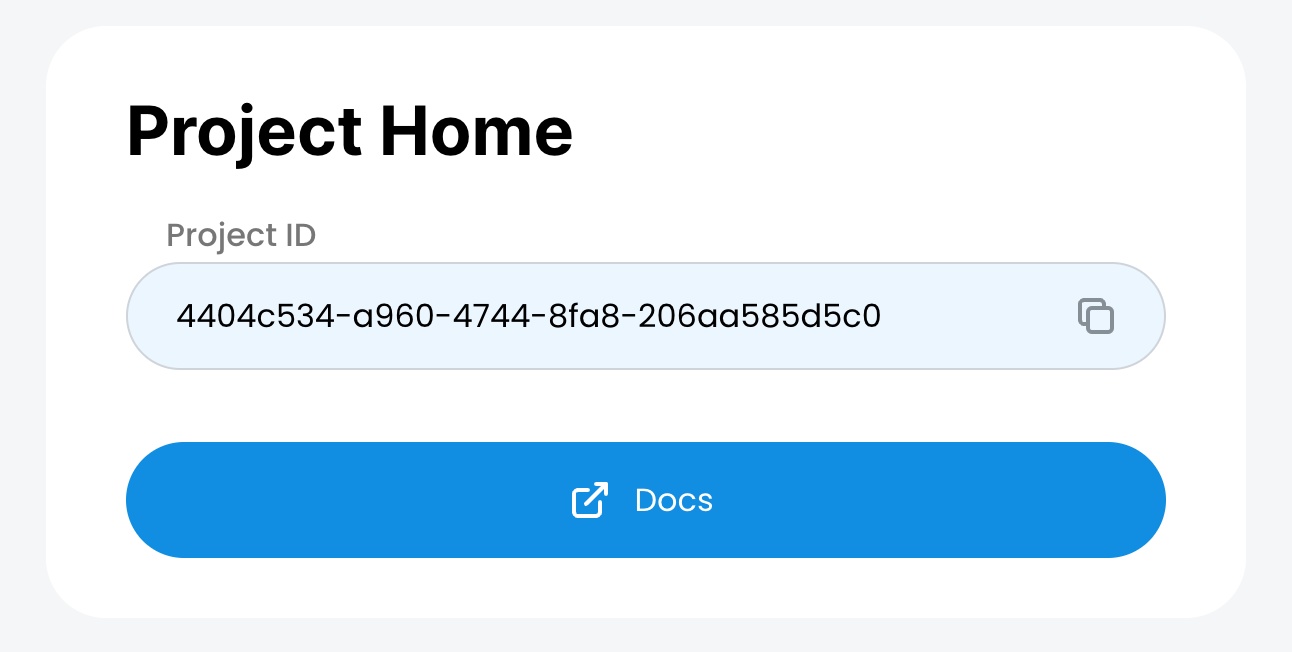
Note that your project has an ID. We will be using this ID in one of the later steps.
Set up gas policies
While we are at the dashboard, let's set up "Gas Policies" -- rules that determine which transactions we will sponsor gas for.
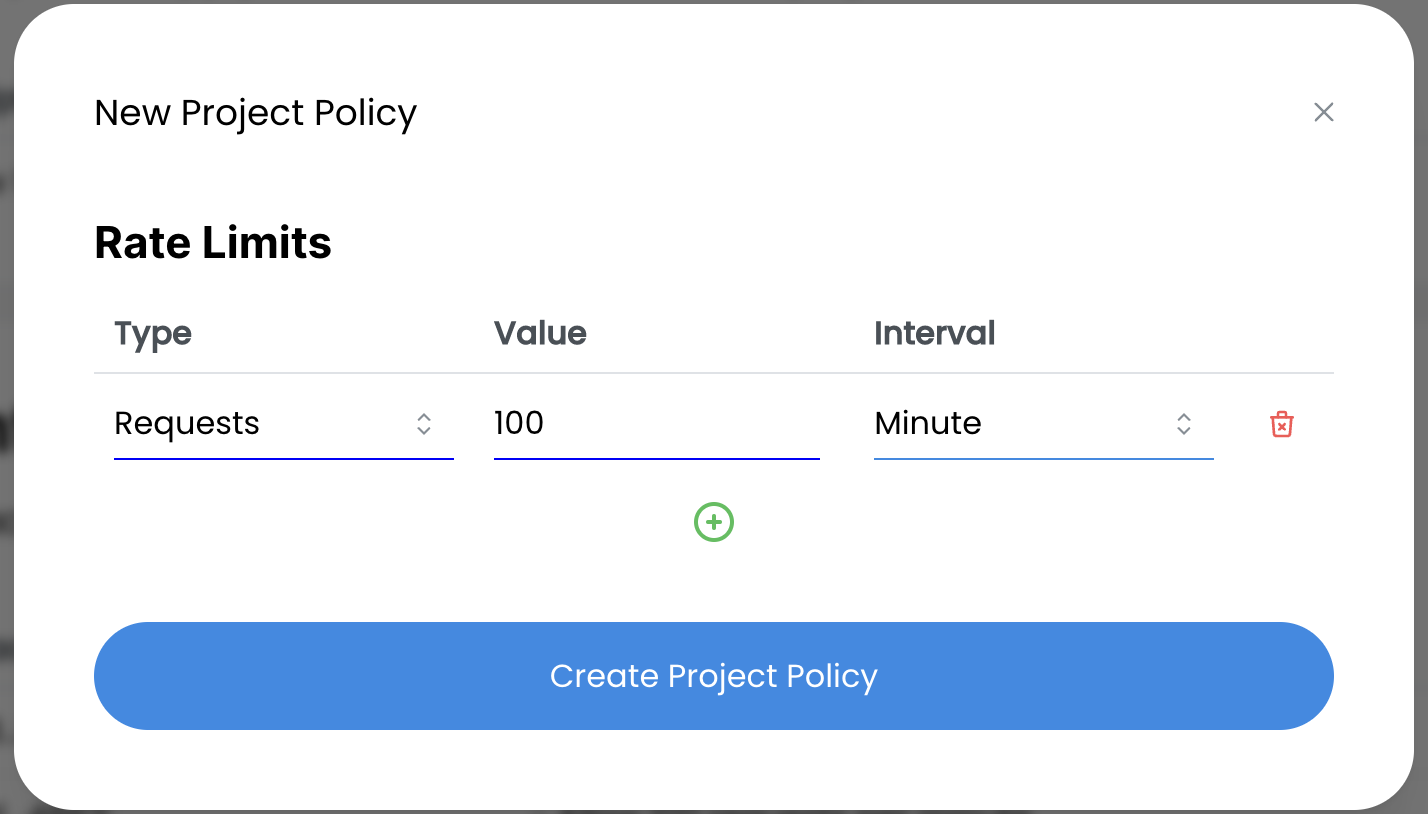
Go to the "Gas Policies" section of you dashboard and create a new "Project Policy":

Here we are saying that we will sponsor up to 100 transactions per minute.
Install dependencies
Create an empty working directory and initialize it with npm:
mkdir zerodev-tutorial
cd zerodev-tutorial
npm init -y
Then install the ZeroDev SDK and Ethers:
npm i @zerodevapp/sdk ethers
Send gasless transactions
We will now implement a simple script that:
- Creates an AA wallet from a private key
- Mints an NFT from that wallet, without paying gas
To make things easier, we already deployed an NFT contract on Polygon Mumbai that allows anyone to mint NFTs.
Create a file app.js with the following content
const { Contract, Wallet } = require('ethers')
const { getZeroDevSigner } = require('@zerodevapp/sdk')

const projectId = process.env.PROJECT_ID
const wallet = new Wallet(process.env.PRIVATE_KEY)

const contractAddress = '0x34bE7f35132E97915633BC1fc020364EA5134863'
const contractABI = [
  'function mint(address _to) public',
  'function balanceOf(address owner) external view returns (uint256 balance)'
]

const main = async () => {
  const signer = await getZeroDevSigner({
    projectId,
    owner: wallet,
  })

  const address = await signer.getAddress()
  console.log('My address:', address)

  const nftContract = new Contract(contractAddress, contractABI, signer)

  const receipt = await nftContract.mint(address)
  await receipt.wait()
  console.log(`NFT balance: ${await nftContract.balanceOf(address)}`)
}

main().then(() => process.exit(0))
Feel free to read the script and see what it's doing. It should be fairly straightforward to understand.
The script requires that we set a project ID and a private key. We can generate a random private key with this command:
node -e "console.log(require('ethers').Wallet.createRandom().privateKey)"
Then export the variables:
export PROJECT_ID="your project ID"
export PRIVATE_KEY="your private key"
Make sure to replace the values with your actual project ID and the private key you just generated.
Now run this script:
node app.js
If everything goes well, you should see output like:
My address:  0xdc25579151367F44a99E9e92D1E4237200A32Cba
NFT balance: 1
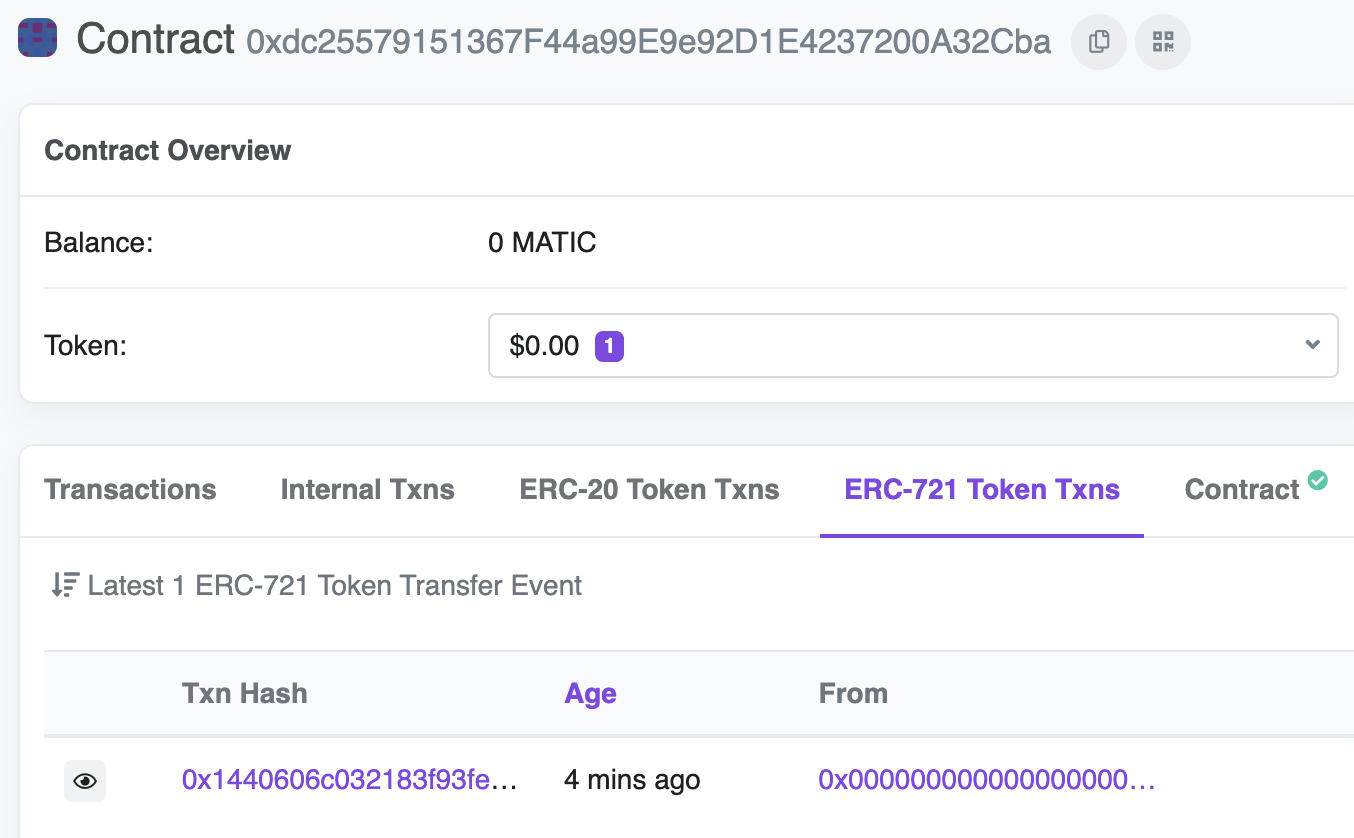
Boom! You just sent a your first gasless AA transaction. You can go to the block explorer and search for your address, and you should see a transaction under the ERC-721 Token Txns section, even though your wallet has no gas. Magical!

You might wonder why you don't see any transactions in the block explorer. This is because a ERC-4337 transaction is not a regular transaction. To see your transactions, use a ERC-4337 explorer such as JiffyScan.
Note how our account is identified as a "contract" by the block explorer. This is because in account abstraction, all accounts are smart contract accounts.
Feel free to run the script a few more times to mint more NFTs. It's free after all :)
Bundle transactions
Minting one NFT at a time is cool, but what if we wanna mint two at a time? With a traditional wallet, you'd have to send two transactions. With AA, we can bundle multiple transactions and send them as one -- saving the user time and gas.
To mint two NFTs at a time, simply replace this line:
const receipt = await nftContract.mint(address)
With this line:
  const receipt = await signer.execBatch([
    {
      to: nftContract.address,
      data: nftContract.interface.encodeFunctionData("mint", [address]),
    },
    {
      to: nftContract.address,
      data: nftContract.interface.encodeFunctionData("mint", [address]),
    },
  ])
Now, run node app.js again. You should see that your NFT balance is now increasing two at a time!
Next Steps
Now that you have got a taste of ZeroDev, it's time to dive deep into the docs!
- Learn how to create AA wallets.
- Learn how to use AA wallets to build powerful Web3 experiences.